|
Factory Pro Shift STAR
Installation
Suzuki gsx1300r Hayabusa Gen 1 99-07 and Gen 2 08+ |
Install notes:
Installation requires countershaft sprocket removal. Impact wrench
recommended
8mm box wrench and socket set Most newer 12 point 8mm wrenches are
thin enough to work in these close quarters.
Does not require case splitting.
Estimated shop time: 1.0 to 2.5 hours
Suggest to do when replacing chain and sprockets.
It's possible that some individual frames may be bent and welded
very slightly differently, but we haven't seen one, yet.
Thanks to Mike A from Alberta, CAN aka mike1180 of
Hayabusa.org and thebusa.com, for the pics and
instruction template
April 21, 2010
|
|
- Put the transmission in neutral.
- Drain the oil,
- Remove left fairing,
- Coolant overflow,
- Kickstand assembly (2 large bolts),
- Clutch slave mount,
- Shifter linkage,
- This now exposes the sprocket, water pump
and shifter housing
- Remove the 2 bolts holding the water
pump. (it just pulls out when these 2 (red) are removed)
- There is a slot on the back of
the water pump shaft that has to be lined up when
re-installing so look at it now.
- Plug the hole with a cloth or
towel.
|
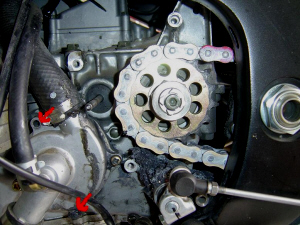 |
- Remove sprocket nut (impact wrench)
- Speed sensor allen bolt
- Sprocket
- Tie up chain (or put out of the way)
|
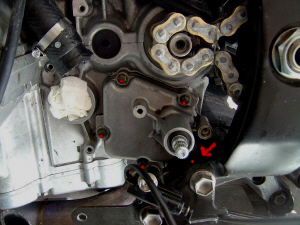 |
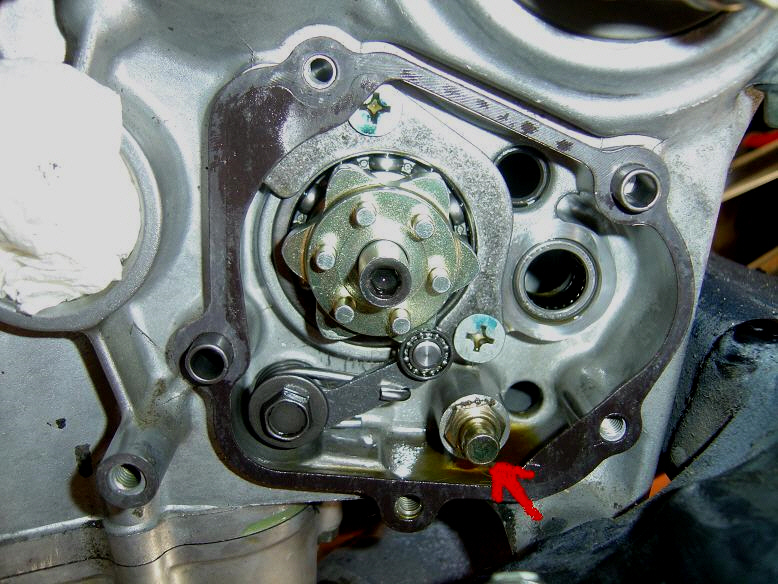
- Remove the 5 bolts holding on the shifter
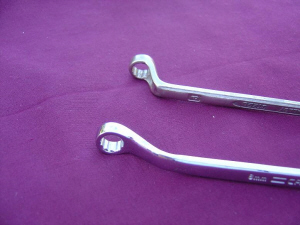
housing. There is one bolt (red arrow) that you need a thin or
offset 8mm 12 point box wrench for. These box end wrenches would
work.
|
 |
- Pull the shifter housing off towards you.
(leave the shift shaft in the cover so you can see how it will
go back on)
- Sometimes 1 or 2 of the alignment dowels
will stick in the cases and will prevent a screw from coming
out and keep you from getting the cover out - use
needle nose pliers to lift them out of the case and up the
screw shaft if necessary.
- You have to turn the cover about 90
degrees or so as it comes off, to clear the frame. Also have
to jiggle it a bit for that 1 troublesome bolt to dislodge
itself.
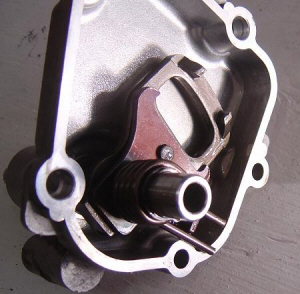
- Here is a pic with the shaft still in the
housing (inside view). Now that you have studied it, pull off
the shaft.
|
 |
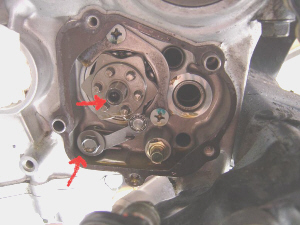
- Remove the allen screw that holds on the
star, and the 10mm headed bolt that holds on the detent arm.
|
 |
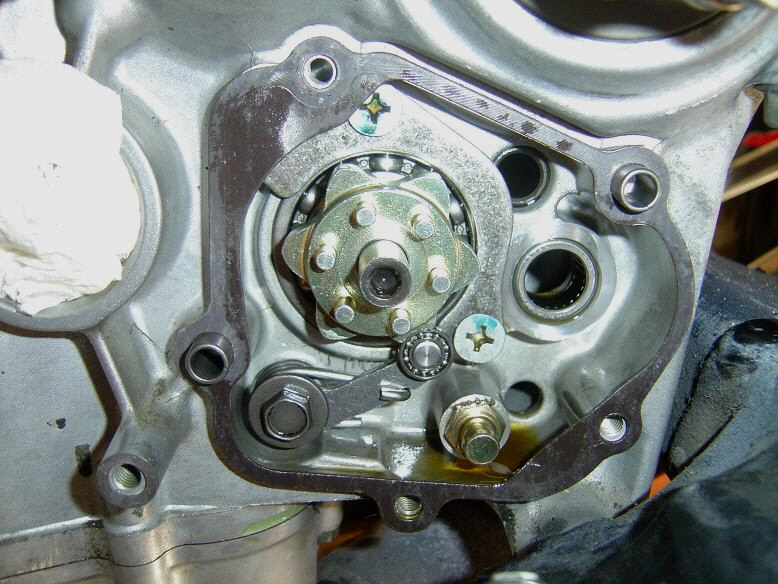
- Remove the old star, the old detent arm and
spring.
- Replace with the new ones from the kit.
- They are simple and can only go on one
way.
- The star has a small offset hole and that
lines up with a pin on the end of the shifter fork hub.
- Reinstall the allen screw on the star
5-7 ft lbs torque
- Reinstall the detent arm pivot bolt
5-7 ft lbs torque
- Replace gasket with new supplied gasket.
|
 |
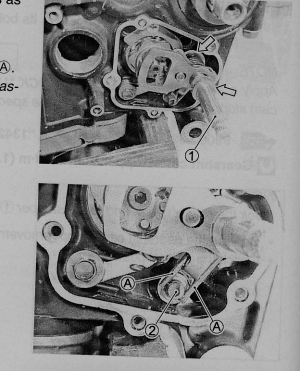
- Remove the shift assembly shaft from the
housing cover.
- Install it into the shift mechanism.
- Be sure to line up the oval opening of
the shift arm over the pins on the star.
- Line up the shift shaft centering spring
|
 |
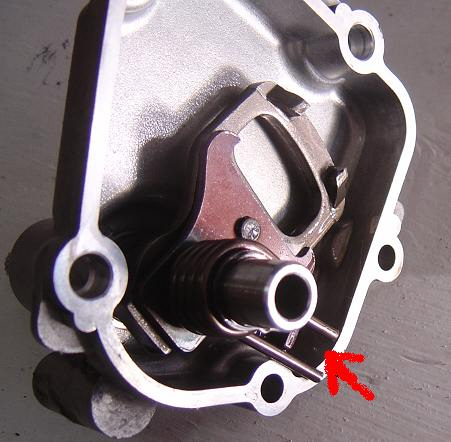
- When you assemble, make sure these spring's
2 arms go over over this gold pin - one arm of spring on each side of the
pin.
- Slide the shifter housing back over the shifter shaft and install the 5 bolts.
- Check and see if it shifts nicely (put the shifter lever on temporarily)
BEFORE
you put the water pump and sprocket, etc back on.
- When test shifting through the gears, you
MUST rotate the countershaft sprocket shaft back and forth
to allow the gear dogs and slots to line up inside the
gearbox.
- If the transmission won't shift through
the all the gears (while rotating the shaft back and forth),
stop - There is something wrong (somehow) in your assembly).
Recheck your work - If it's not right now, and you don't
figure out what it is, I promise you... It won't fix
itself...... or "get better" after riding -
That being said, it's pretty hard to assemble wrong.
- Now all goes back together.
TIP: Always put a dab of grease on all the oil seals or o-rings when putting
them back together.
|
 |
 |
| Through the magic of "cut and paste", you will
soon have what looks like this and |
 |
| Then like this. |
 |


